QR Batch Upload Guide
This guide walks you through using QR Batch Upload to upload multiple garment sets at once, separated by QR codes.
Video Tutorial
Part 1: Generate QR Codes
Before uploading, you need to generate QR codes that will act as separators between garment sets.
Step 1: Open QR Workflow
Log into the Aistetic dashboard and navigate to QR Workflow.
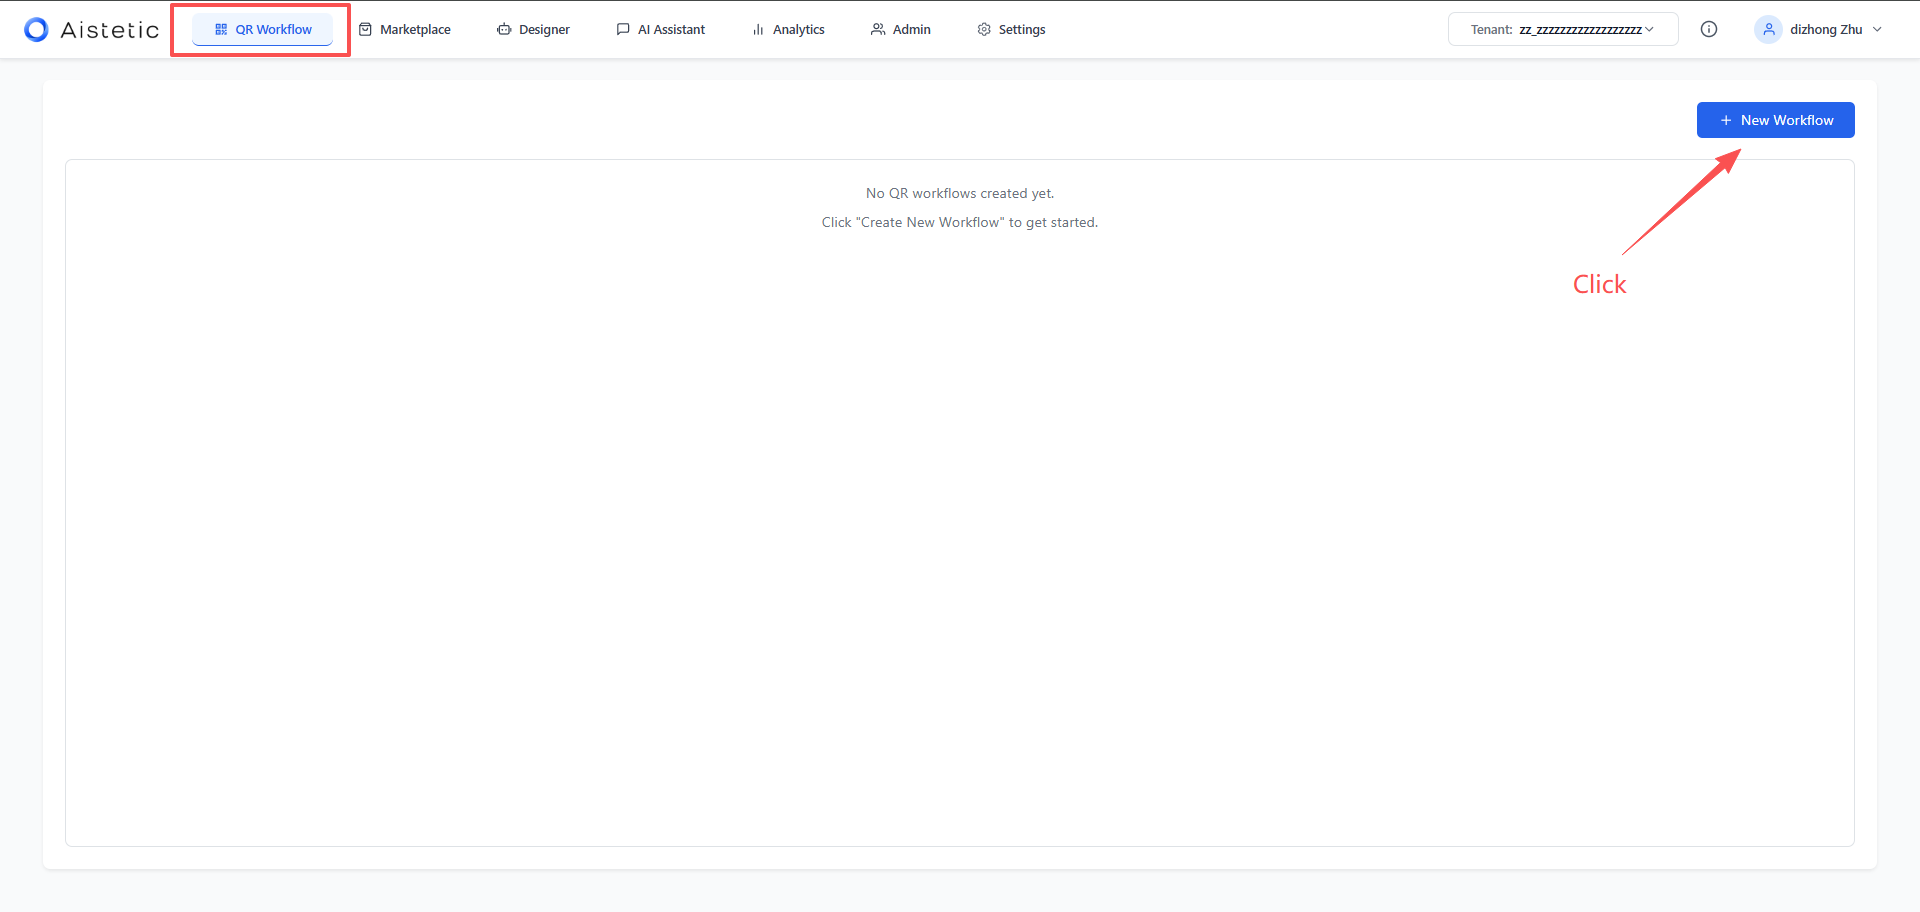
Step 2: Create a New Workflow
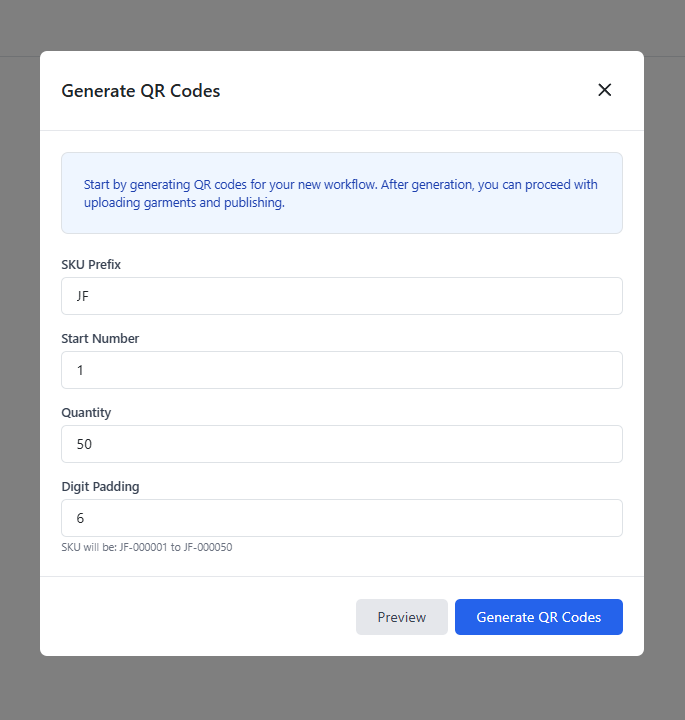
Click New Workflow and fill in the details:
- SKU Prefix — a letter-based prefix for your SKU numbers (e.g.,
SKU) - Starting Number — the number to start from, depending on which set you are in
- Quantity — how many QR codes to generate (e.g., 50, 100 — it doesn't matter if you print more than you need)
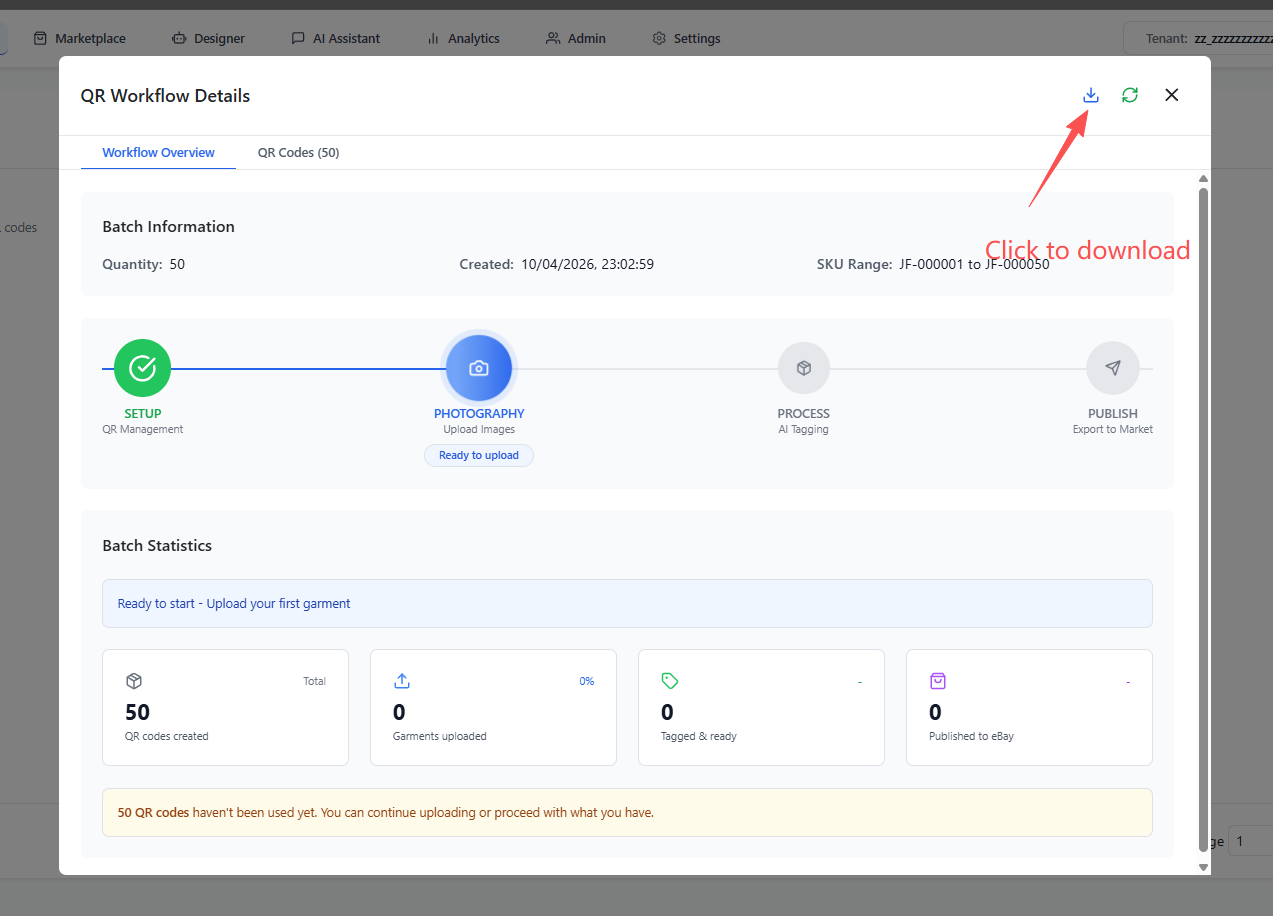
Step 3: Generate and Download QR Codes
Click Generate to create your QR codes, then click Download All QR Codes.
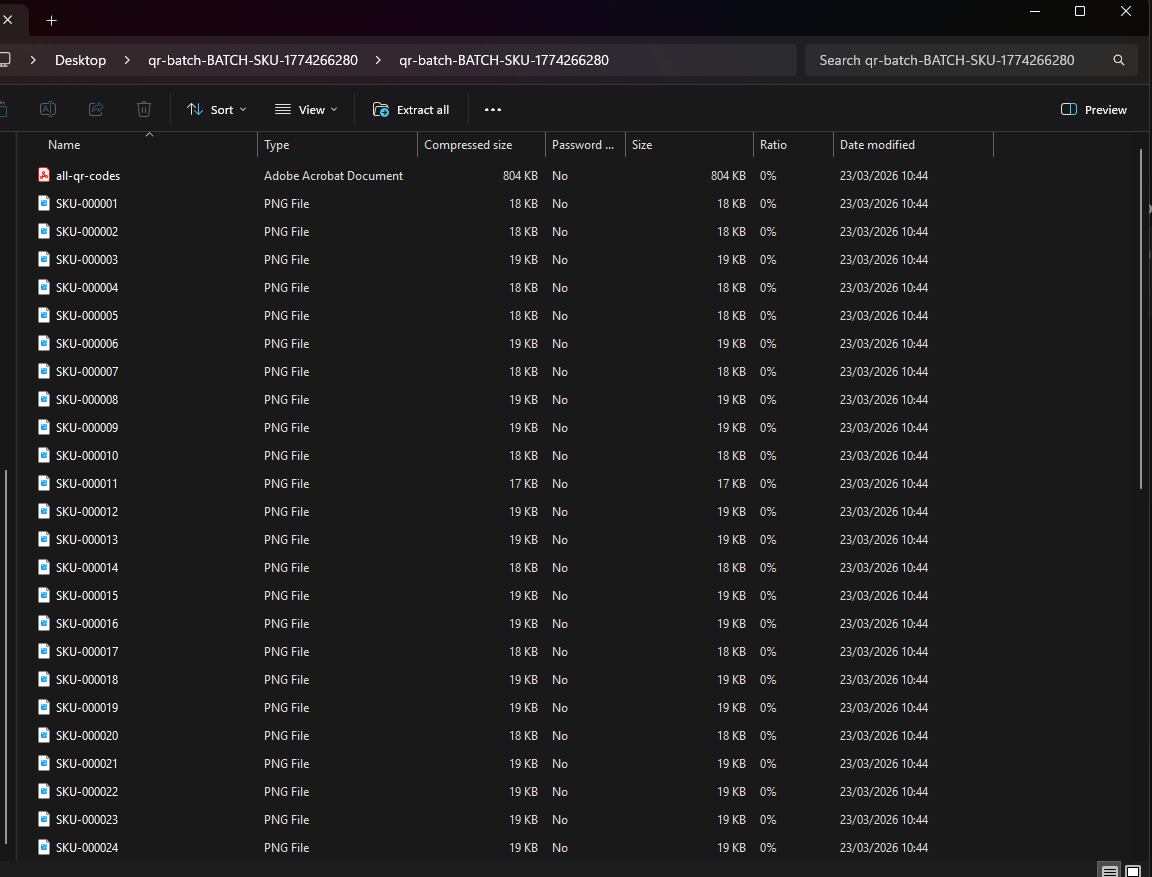
Step 4: Print QR Codes
The downloaded ZIP file contains:
- Individual PNG files — one QR code per file, which you can print separately
- A PDF file — all QR codes on printable pages, each showing the SKU number and QR code
Print the QR codes and hand them to your photographer. Each QR code displays a SKU number — the system will read this automatically during upload to identify each garment set.
Part 2: Capture Images with QR Codes
When photographing garments, follow this sequence:
- Take a photo of the QR code for the first garment set
- Take photos of the garment (as many as needed)
- Take a photo of the next QR code to start a new set
- Take photos of the next garment
- Repeat for all garment sets
The order of images is critical. Each QR code photo marks the beginning of a new garment set. The system reads the SKU number from the QR code automatically.
Part 3: Upload Using QR Batch Upload
Step 5: Open QR Batch Upload
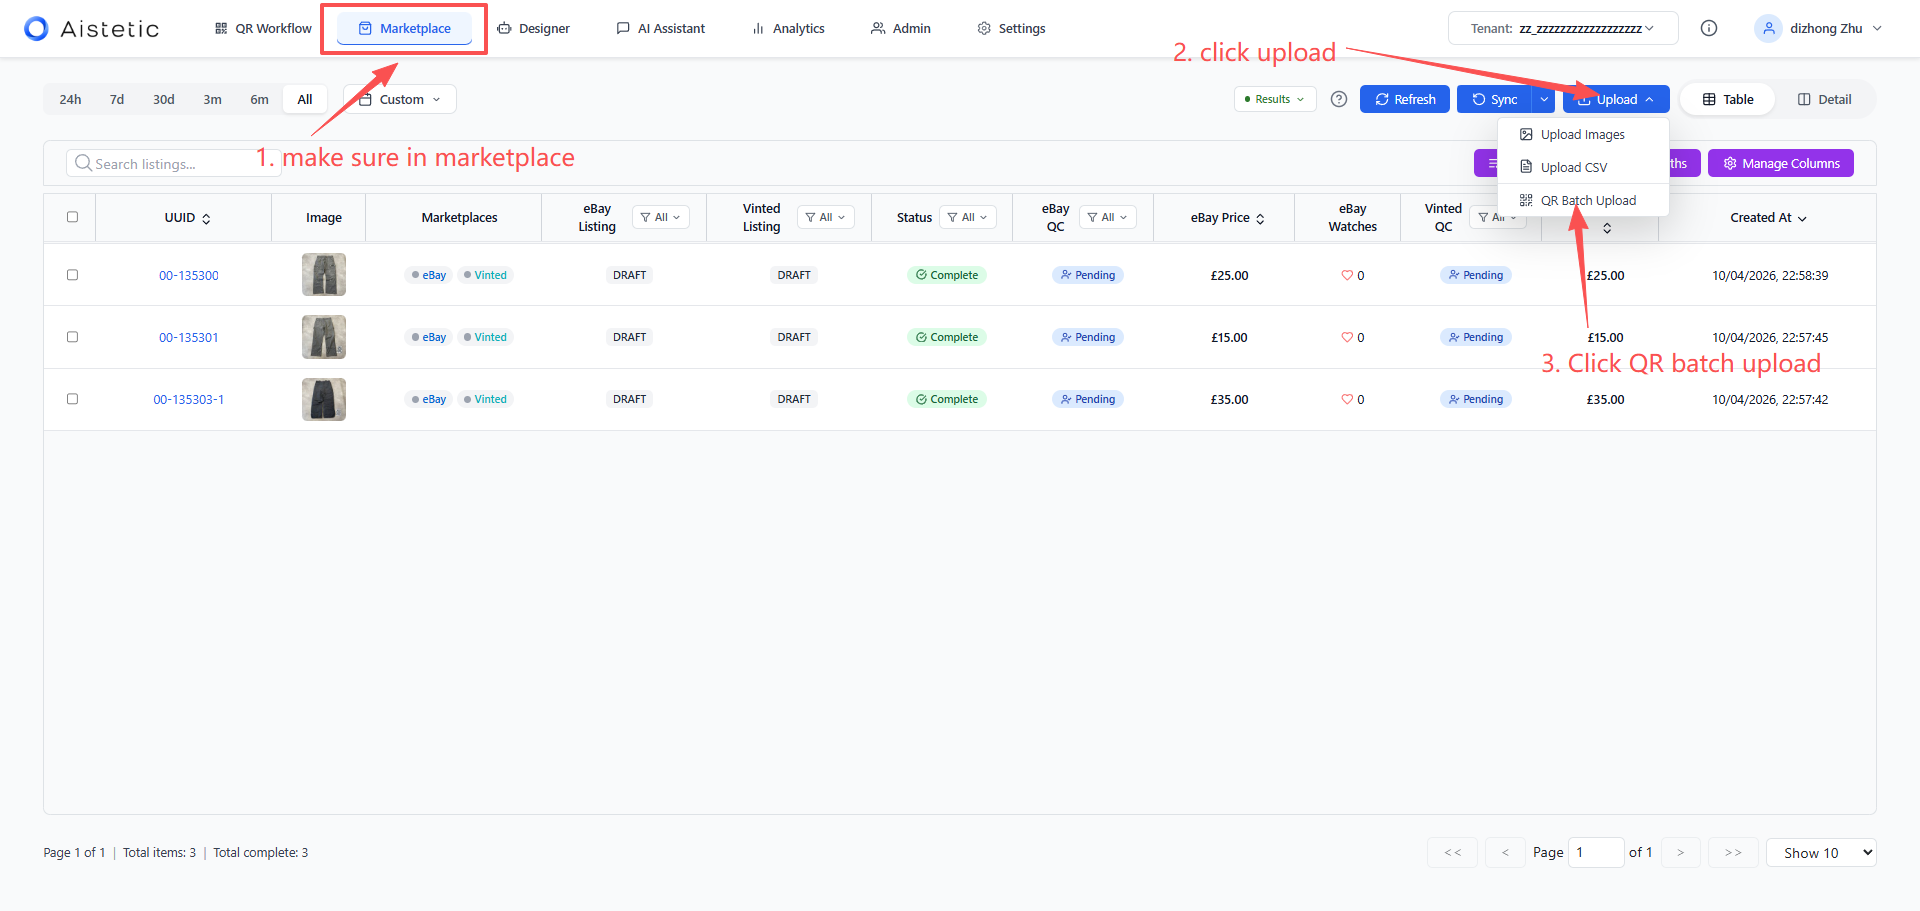
In the Aistetic dashboard, go to Marketplace, click Upload, and select QR Batch Upload.
Step 6: Select Your Images
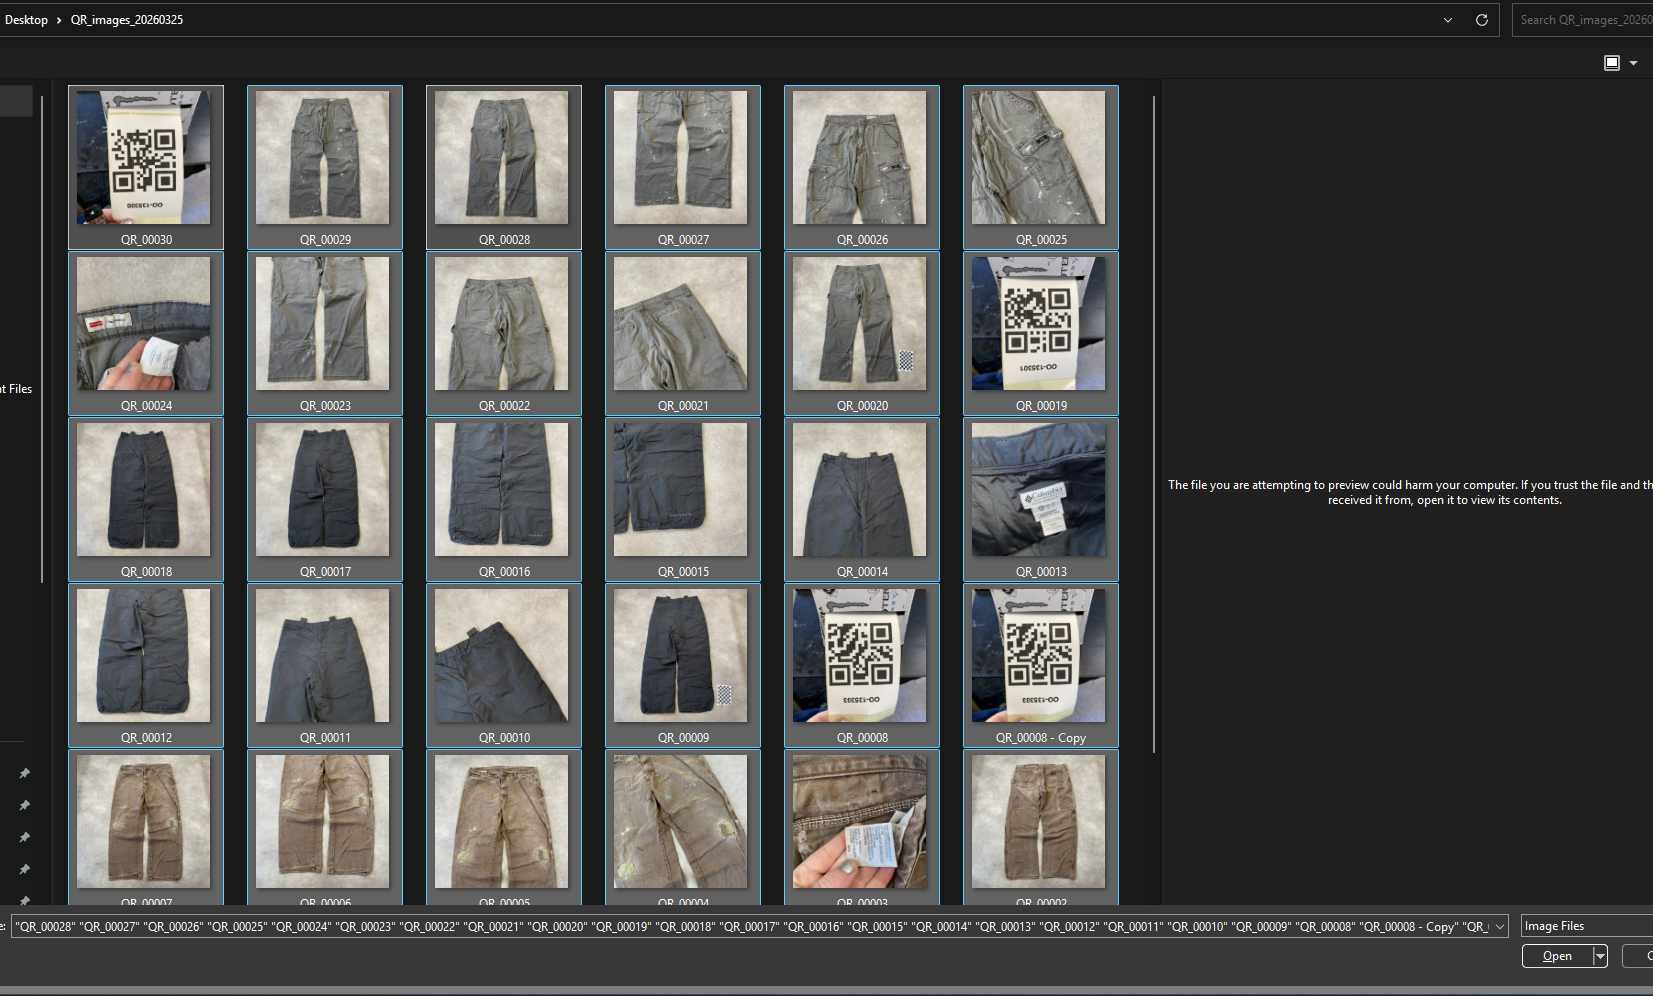
Click Choose Files, select all your images (QR codes and garment photos together), and open them.
Step 7: Review Detected Sets
The system will process your images and split them into sets based on the QR codes. Check the Detection Summary to verify the correct number of sets was detected.
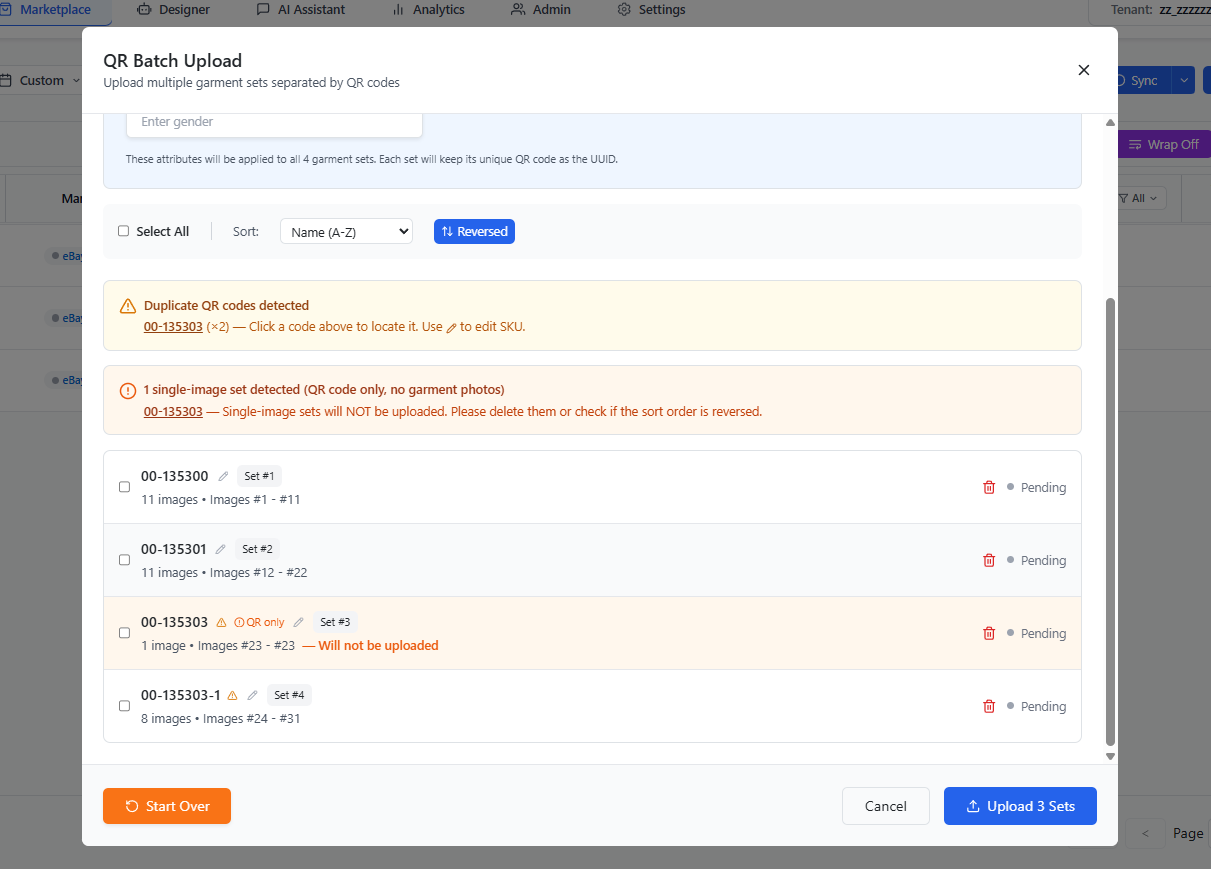
If the Detection Summary shows fewer sets than expected (e.g., only 1 set from many images), your operating system may have uploaded the images in reversed order. Click the Reverse button to fix this. See Image Order Issue for more details.
Step 8: Upload
Once everything looks correct, click Upload to send the garment sets to the server for processing.
Your garment sets are now being processed!